Multi-person Motion Capture
You can run the Dollars MoCap program on multiple computers separately, and gather the motion capture results into the same Unity scene to achieve multi-character interaction.
Setup
If you want to perform motion capture on Computer A (IP address 192.168.1.3) and Computer B (IP address 192.168.1.10) and combine the results in the Unity scene on Computer A, follow these steps,
Ensure Connectivity
First, ensure that Computer B can ping Computer A using the ping command in the Command Prompt. If the ping is unsuccessful, check the firewall settings on both computers.
Running Dollars MoCap
On Computer A, run the Dollars MoCap program as usual.
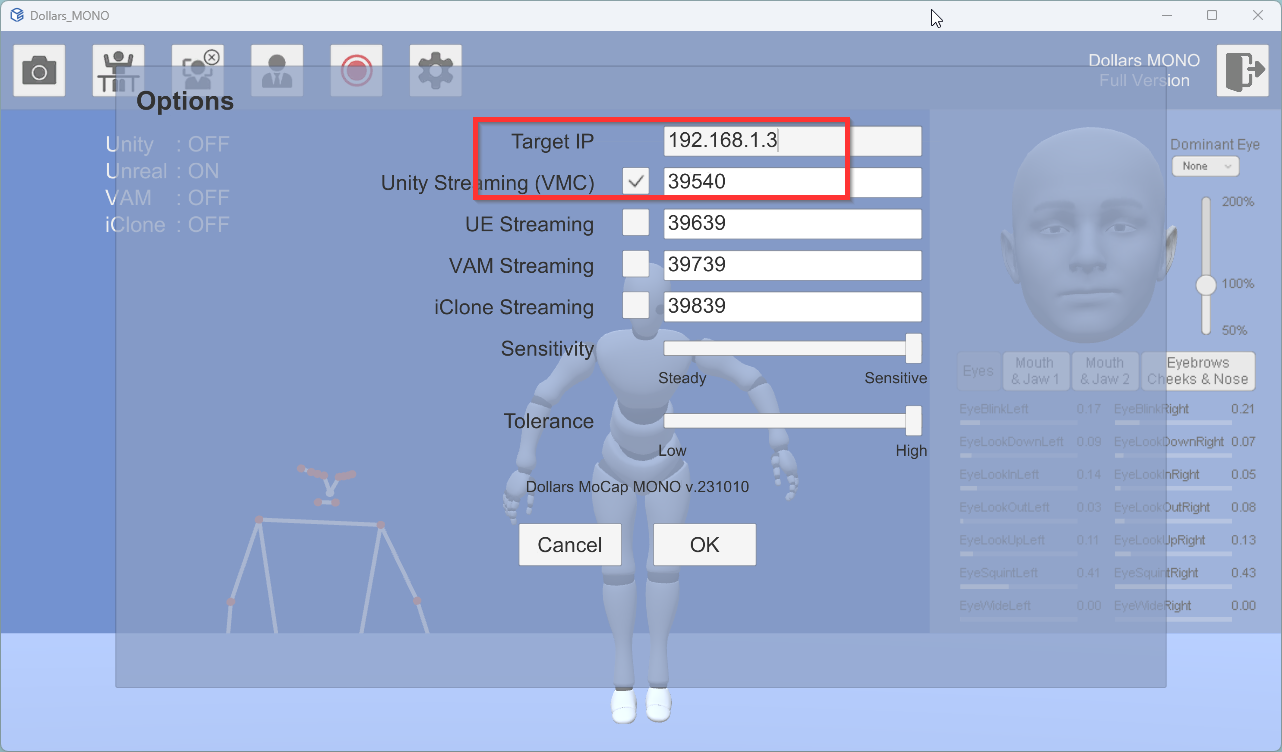
On Computer B, after running the Dollars MoCap program, open the options dialog box, enter the IP of Computer A (192.168.1.3) in the IP field, and change the Unity port to a number other than 39539, for example, 39540, as shown in the image below.

You can also run multiple instances of the Dollars MoCap program on the same computer.
In this case, keep the IP as the default local address, 127.0.0.1, and just make sure to set the Unity port numbers to different values for each instance.
Unity Scene Setup
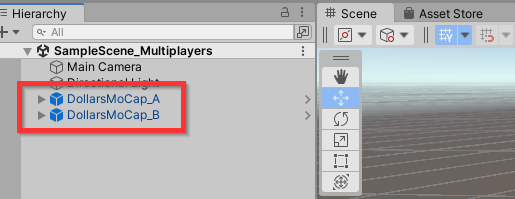
In the Unity scene on Computer A, add two DollarsMoCap Prefabs.
For easy identification, name them respectively as DollarsMoCap_A and DollarsMoCap_B.

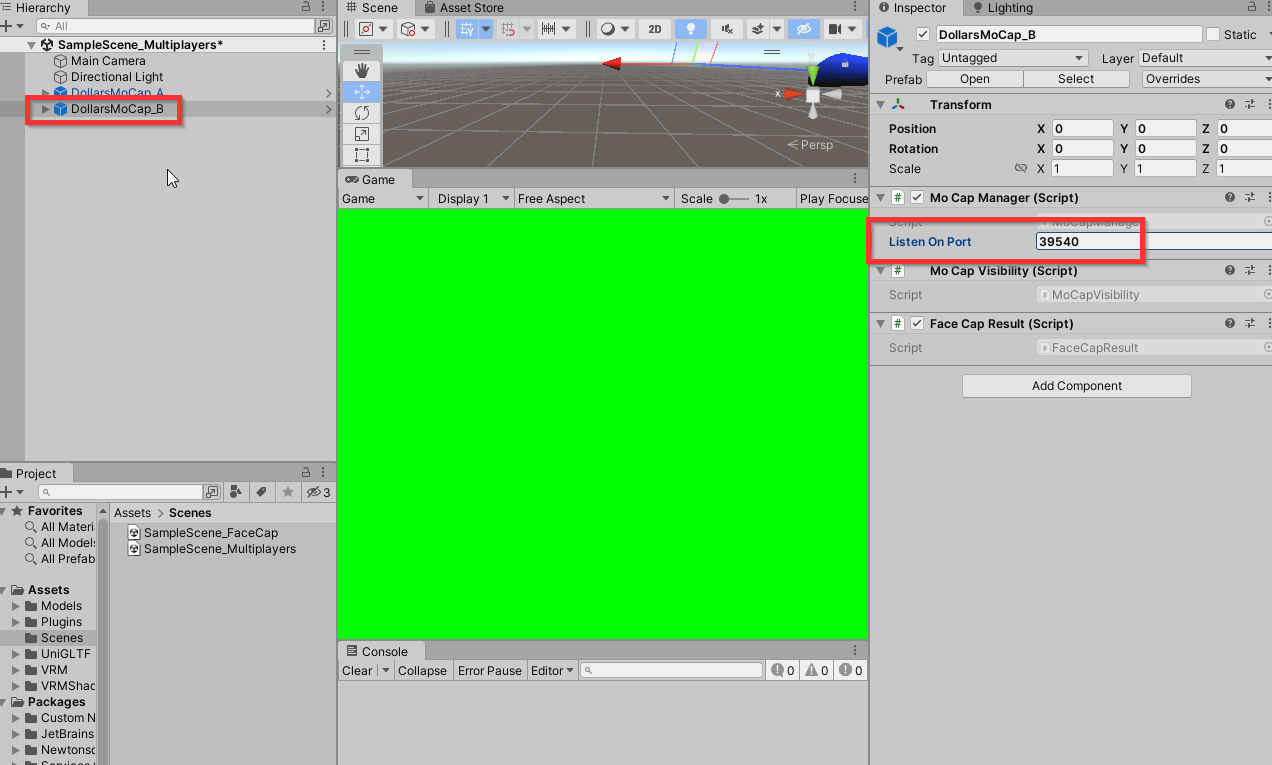
Select DollarsMoCap_B and modify the Listen On Port in its MoCap Manager component, filling in the port number 39540 that we just changed on Computer B.

Character Setup
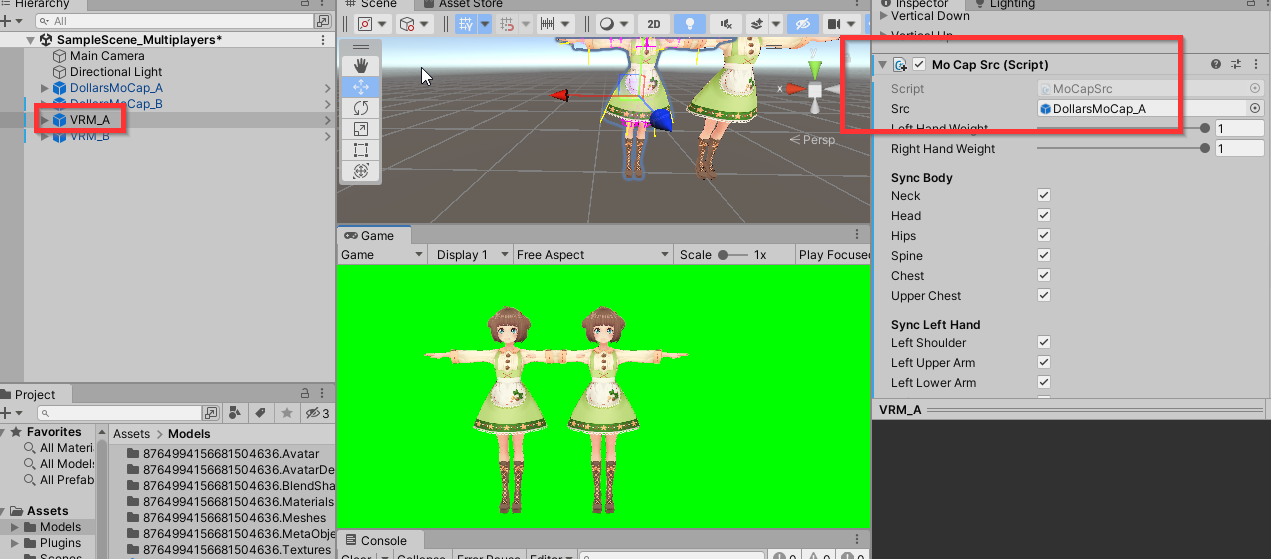
Add two humanoid models and name them VRM_A and VRM_B, respectively. Then, add the MoCapSrc component to each of them.
In the MoCapSrc component of VRM_A, assign DollarsMoCap_A as the motion capture source. This links the VRM_A model to receive motion capture data from the DollarsMoCap_A Prefab.

Similarly, in VRM_B, assign DollarsMoCap_B to the MoCapSrc component. This completes the setup.

Now both humanoid models, VRM_A and VRM_B, are configured to receive motion capture data from their respective sources.
You can download a sample Unity project with the above setup from the following link:
https://drive.google.com/u/0/uc?id=1Rd3Orx3LnAw8vcGqH3B9VB57bOHYD8eK&export=download